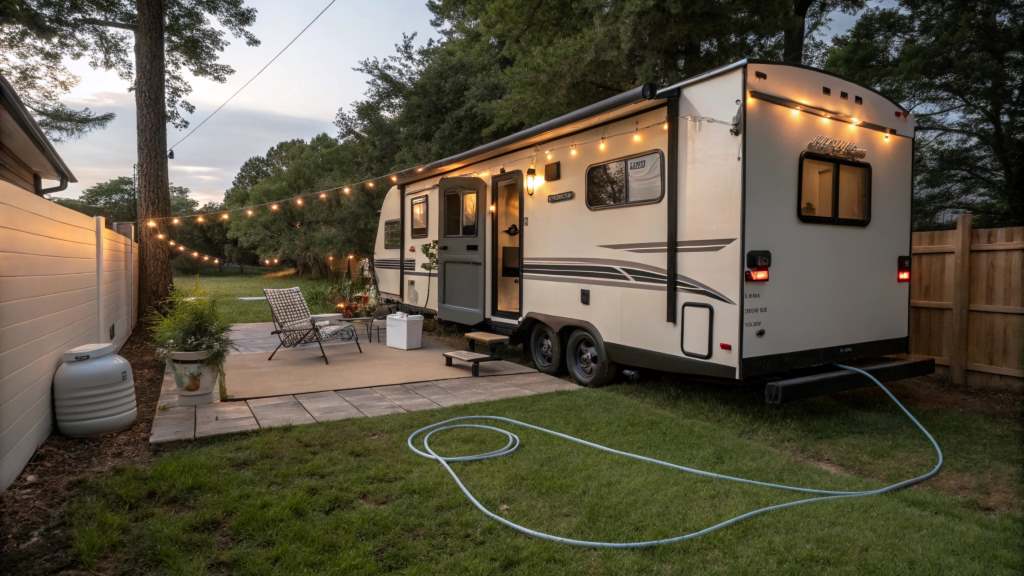
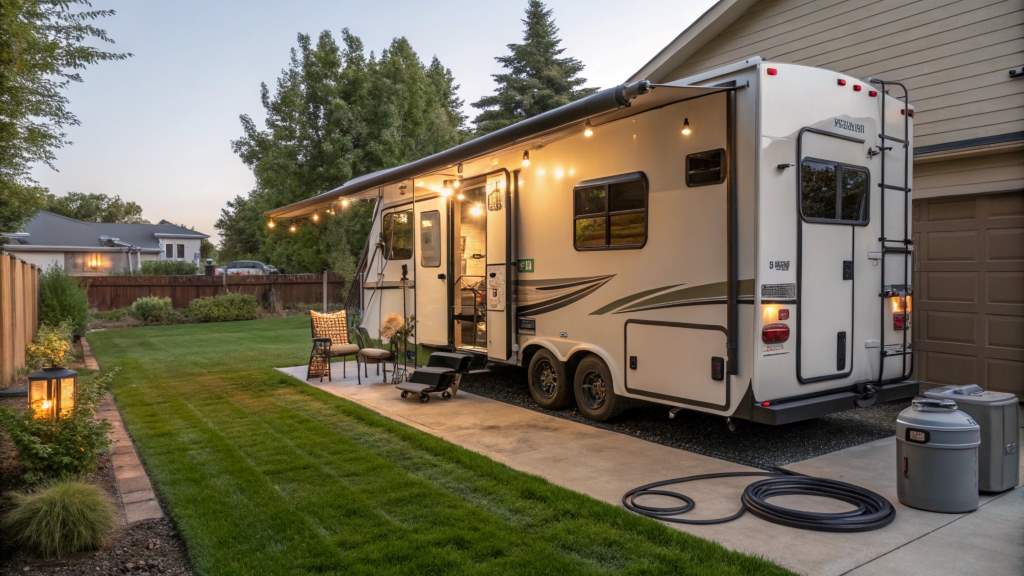
If you’re an RV enthusiast, then setting up an RV hookup at home can be a game-changer. Imagine having the convenience of staying in your RV, without the need to constantly find an RV park, all while having access to water, electricity, and sewer systems right in your driveway.
For those of us who enjoy the open road but want the comfort of home, this setup allows the best of both worlds. So, if you’ve ever wondered how to set up an RV hookup at home, this guide is for you. Whether you’re looking to install water connections, electricity, or even a sewer system, we’ll cover everything you need to get your setup running smoothly.
If you’re interested in some great RV camping experiences, be sure to explore Jamesonsjourney to discover some fantastic ideas for your next adventure! Let’s dive into the details of how you can set up your RV hookup at home to make it as easy and cost-effective as possible.
Understanding RV Hookups
Before you begin, it’s important to understand what you’ll need for a complete RV hookup. An RV hookup consists of three main utilities:
- Electrical connection
- Water hookup
- Sewer connection
Setting up these services at home might sound complicated, but it’s simpler than you think if you break it down into manageable steps. You don’t need to be a professional to set up your RV hookup, but understanding the basics will help you avoid potential issues down the line.
Planning Your RV Hookup Location
The first step to setting up your RV hookup at home is choosing the best location for your RV. Ideally, you want to park your RV near an existing power source, water supply, and a suitable area for draining waste. Here are a few factors to consider:
- Space Requirements: Ensure that your driveway or parking area is large enough to accommodate the RV. Typically, a standard driveway will suffice for a small-to-medium-sized RV. Make sure there’s enough space to allow access to utilities.
- Access to Utilities: If your driveway is far from your water supply or power panel, consider the cost and feasibility of extending these lines.
- Ground Conditions: Your RV will be heavy, so make sure the ground is level and stable enough to support the weight. This also helps with drainage and waste management.
Once you’ve picked the perfect spot, the next step is planning how to route the water, electricity, and sewer lines to that location.
Setting Up Electrical Hookup for Your RV
One of the first things you’ll need to do is ensure your RV is powered while parked at home. To do this, you will need an electrical hookup. Here’s how to go about it:
Determine Your Power Needs
Most RVs use a 30-amp or 50-amp service, depending on the size and features of your RV. It’s essential to figure out which type of power your RV needs before purchasing a hookup.
- 30-Amp Service: This is common for smaller RVs and trailers. It provides enough power for basic appliances and lighting.
- 50-Amp Service: Larger RVs, especially those with multiple air conditioners or high-powered appliances, may need this type of service.
Installing an RV Electrical Outlet
Once you’ve determined the type of service your RV needs, you’ll need to install an electrical outlet to match. Here are the steps:
- Hire an Electrician: For safety reasons, it’s highly recommended to hire a licensed electrician to install the correct outlet and breaker for your RV. They’ll ensure your home’s wiring system can handle the load.
- Install a Dedicated RV Circuit: The electrical system in your home is not designed to power an RV, so you’ll need a separate breaker and wiring for the RV outlet.
- Place the Outlet Near Your RV: Ideally, the outlet should be located within 25 feet of the RV parking area. If it’s farther, you may need an extension cord designed for RV use.
Setting Up Water Hookup for Your RV
Having water available is another key component of RV hookup at home. Fortunately, connecting water to your RV is relatively easy, and here’s how to go about it:
Choose the Right Water Hose and Fittings
- RV-Specific Water Hose: It’s important to use a water hose designed for RV use. These hoses are non-toxic and are built to handle water that will be used for drinking and bathing.
- Water Pressure Regulator: Water pressure in most home systems is too high for an RV. To protect your RV’s plumbing, use a water pressure regulator to reduce the pressure.
Install a Water Source
- Find the Right Water Connection: Most homes have outdoor faucets that can be used for your RV hookup. If you don’t have an exterior faucet, you can install one.
- Connect to the RV: Use your water hose to connect the faucet to your RV’s water inlet. Ensure the hose is long enough to reach your RV’s hook-up point.
Winterizing Your Water System
If you plan on using your RV hookup in colder weather, you should winterize the system to prevent the pipes from freezing. This typically involves using antifreeze in the water lines and removing any excess water after use.
Handling waste might be the least glamorous part of RV living, but it’s an essential component when setting up your RV hookup at home. Here’s how to set up your sewer system:
Most RVs have a black tank for sewage and a gray tank for wastewater from showers and sinks. You’ll need to hook up both to your home’s septic system or sewer line.
Sewer Hookup Options
- Direct Sewer Connection: If your home is connected to a municipal sewer system, you can hook your RV directly to the sewer line using a sewer hose. This is the easiest method and allows for continuous waste disposal.
- Septic Tank: If your home uses a septic tank, you can install a dedicated line that connects your RV to the septic system. This may require some digging, so it’s a good idea to consult with a professional plumber.
Proper Disposal
Once your RV is hooked up to the sewer system, make sure you follow proper disposal guidelines. Always use a sewer hose with a secure connection to avoid leaks, and make sure the tanks are emptied properly to avoid clogging.
Big Sur RV Parks: A Great Alternative for Extended Stays
If you ever feel the need to take a break from your home setup, consider visiting Big Sur RV Parks for a unique camping experience. Located along the stunning California coast, these parks offer both scenic views and excellent amenities for RV travelers.
Explore what Big Sur has to offer and enjoy a vacation with access to some of the best natural beauty in the country. Whether you’re new to RV camping or a seasoned veteran, Big Sur offers options that cater to all types of RVers. Be sure to check out the Big Sur RV Parks for your next adventure.
Additional Tips and Considerations
Setting up your RV hookup at home may involve some upfront cost, but it’s an investment that pays off over time. Here are a few additional things to keep in mind:
- Permits: Depending on your local regulations, you may need a permit to install a water or sewer hookup. Be sure to check with your local city or county office.
- Extension Cords: If you’re not ready to install a dedicated electrical outlet, you can use heavy-duty extension cords to temporarily power your RV.
- RV Accessories: Consider investing in additional RV accessories like a surge protector, water filter, and leveling blocks to make your setup as comfortable as possible.
Conclusion
Setting up an RV hookup at home doesn’t have to be complicated or expensive. With some planning, the right equipment, and possibly a professional to assist with the more technical aspects, you can easily create a convenient, comfortable space for your RV right in your own backyard. Whether you need electricity, water, or sewer services, this guide has provided the essential steps to set it all up.
With a little time and effort, you’ll be able to enjoy the full RV experience from the comfort of home.